Configuring Guided Selling
In Omnichannel Personalization, Guided Selling can be enabled under the Dynamic Experiences using the available template set for guided selling alone. The configuration of Guided Selling involves the creation of dynamic experience and variations to set up the questionnaires based on Seed Category, Seed Product, Product Attribute, and Price, which can be mapped to catalog elements.
For detailed steps on how to create dynamic experiences, see Create Dynamic Experiences.
For detailed steps on how to create variations, see Create Variations.
Selecting Template for Guided Selling
Perform the following steps to select a template for guided selling:
-
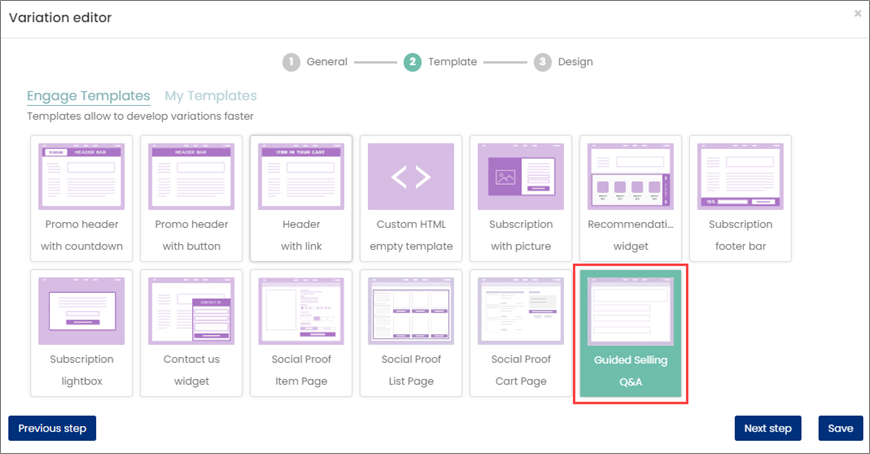
In the Variation editor window, click the Template tab.
Note: The Variation editor window is displayed either by creating a new experience or editing an existing variation.
-
On the Engage Templates tab, select the Guided Selling Q&A template.
-
Click Save.
-
Click Next step.
Setting Up Variables for Guided Selling
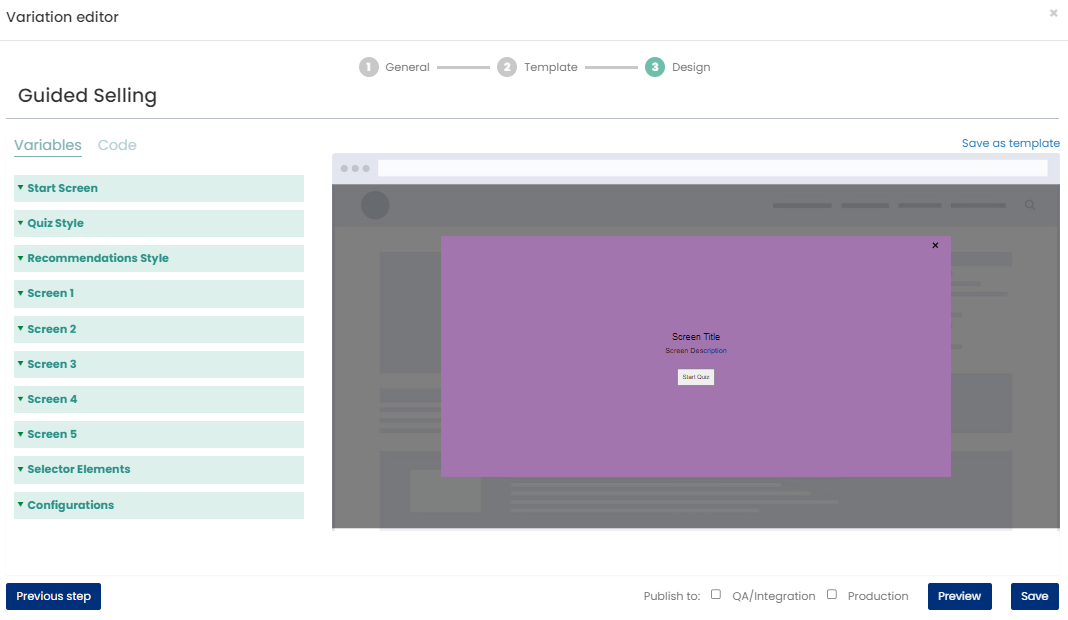
The 'Design' step allows you to set up variables available for the Guided Selling template. The templates have default variables for Guided Selling to ensure that non-related variables are not defined by client-side users. Additional changes may be required to make it work for the client site. The template provides a list of variables to configure the variation for Guided Selling. You can also customize the variables using HTML, CSS, and JS.
Perform the following steps to set up the variables:
-
In the Design step, click the Variables tab.
-
Click Start Screen to expand and then specify the following variables:
-
Enable Start Screen: Select the checkbox to enable the start screen.
-
Screen Title: Specify the screen title.
-
Screen Description: Specify the screen description.
-
CTA Text: Specify the call to action text.
-
Start Screen Background Image: Specify the start screen background image.
-
Start Screen Title Font Size: Specify the font size of the start screen title.
-
Start Screen Description Font Size: Specify the font size of the start screen description.
-
-
Click Quiz Style to expand and then specify the following variables:
-
Screen Title: Specify the title of the screen.
-
Font Family: Specify the font style for the Screen Title.
-
Background Image: Select a background image if needed.
-
Background Start Color: Select the start color for the background.
-
Background End Color: Select the end color for the background.
-
Question Font Size: Specify the font size for the question.
-
Question Font Color: Specify the font color for the question.
-
Answer Font Size: Specify the font size for the answer.
-
Answer Font Color: Select the font color for the answer.
-
Answer Background Color: Select the background color for the answer.
-
Selected Answer Border Color: Select the border color for the answer.
-
Progress Bar Foreground Color: Select the color for the progress bar foreground.
-
Progress Bar Background Color: Select the color for the progress bar background.
-
-
Click Recommendation Style to expand and then specify the following variables:
-
Font Family: Specify the font name.
-
Strategy Message Font Size: Specify the font size of the strategy message.
-
Background Color: Select the background color from the dropdown list.
-
Product Name Font Size: Specify the font size of the product name.
-
Price Font Size: Specify the font size of the price.
-
-
Click Screen 1 to expand and then specify the following variables:
Note: Currently, five screens are allowed for guided selling. The setup of variables is similar for all the remaining screens as defined for Screen 1.
-
Question: Specify the question.
-
This question is a type of: Select the question type from the dropdown list. Available options are Seed Category, Seed Product, Product Attribute, and Price.
-
Choose product attribute: If you have selected “Product Attribute” as the question type, select the product attribute from the dropdown list.
Note: The ‘Choose product attribute’ variable is available only if 'Product Attribute' is selected as a question type.
-
Display Text 1: Specify the text of the first answer to be displayed.
-
Display Image 1: Select an image for the first answer if desired. Display images are not required.
Note: If Display Images are used, the answers will be displayed horizontally. If only text is used, the answers will be displayed vertically.
-
Option 1: Select the option from the suggested search list. Options are suggested based on the type of question selected.

-
If you want to have multiple values for a single answer, enter them in a comma-separated list.
-
Only 1 seed category can be used per answer option.
-
If you have selected 'Price' as the question type, enter the values as follows:
-
A 'less than' value (for example, less than $20) should be input as 0-20.
-
A 'range' value (for example, $20-$40) should be input as 20-40.
-
A 'greater than' value (for example, greater than $40) should be input as 40.
Note: Similarly, set up the remaining variables (such as Display Text 2, Display Image 2, and Option 2) as done for Screen 1.
-
-
-
-
Click Selector Element to expand and then specify the following variables:
-
Guided Selling Experience: Specify the div element for the guided selling questionnaire.
-
Resulting Recommendations: Specify the div element for the resulting recommendations.
-
-
Click Configurations to expand and then specify the following variables:
-
Currency Symbol: Specify the currency symbol to be used for any price value.
-
API Client Key: Specify the API Client Key.
-
API Key: Specify the API Key.
-
Strategy: Select the strategy to be used when generating the resulting recommendations.
-
Placement Name: Specify the placement name on which page the guided selling screen should be displayed.
-
Error Message: Specify the error message that you want to display.
-
-
(Optional) Click the Code tab to edit the code and customize the variables of guided selling for display. You can use HTML, CSS, and JS to customize the variables.

-
Select the QA/Integration and Production checkboxes to publish the variation to the QA and production environments respectively.
-
Click Save to save the setup done for all the variables.
The right side of the window displays a preview of the guided selling configured for the variation.

-
Click Preview. The Variation preview configuration window will show a notification saying Preview cache is building, please wait.

-
Once the cache is built, the notification changes to Preview cache is built. then click Preview again.

The preview page will redirect to the actual client site page where guided selling is enabled to display.